The Tools and Tips for Better Podcasts and Videos
Here’s how multifamily marketers can improve their online content without overspending.
When I first thought about recording videos, whether podcasts or shorter social media clips, I assumed I couldn’t start without checking off the made-up list in my head: a better phone, a new microphone, a few ring lights, maybe an external camera and so on. But once I actually started, I quickly realized that I could make good use of the tools I already had with just a few small adjustments.
In fact, better content doesn’t always require better or more expensive equipment. Something as simple as raising your laptop to eye level, changing where you sit, or adding a small external microphone can noticeably improve the final result. And if you are filming with your phone, a few camera settings and framing tricks can go a long way.
That doesn’t mean equipment never matters. A good microphone, a basic light or a sturdy tripod can make recording easier and give you more consistent results, especially if creating video or podcast content becomes part of your regular schedule. The key is knowing what is worth adding to your setup, what you can skip and how to get more out of the tools you already have.
READ ALSO: How to Build a Multifamily Podcast Pros Actually Follow
Your phone and laptop may already be enough
Today, much of this content can be recorded on your phone for short social media videos or on your laptop for remote podcast episodes. So, I’d be cautious about spending a lot of money on an expensive camera. The easiest way is to use the tools you already have and make a few small adjustments to improve the result.
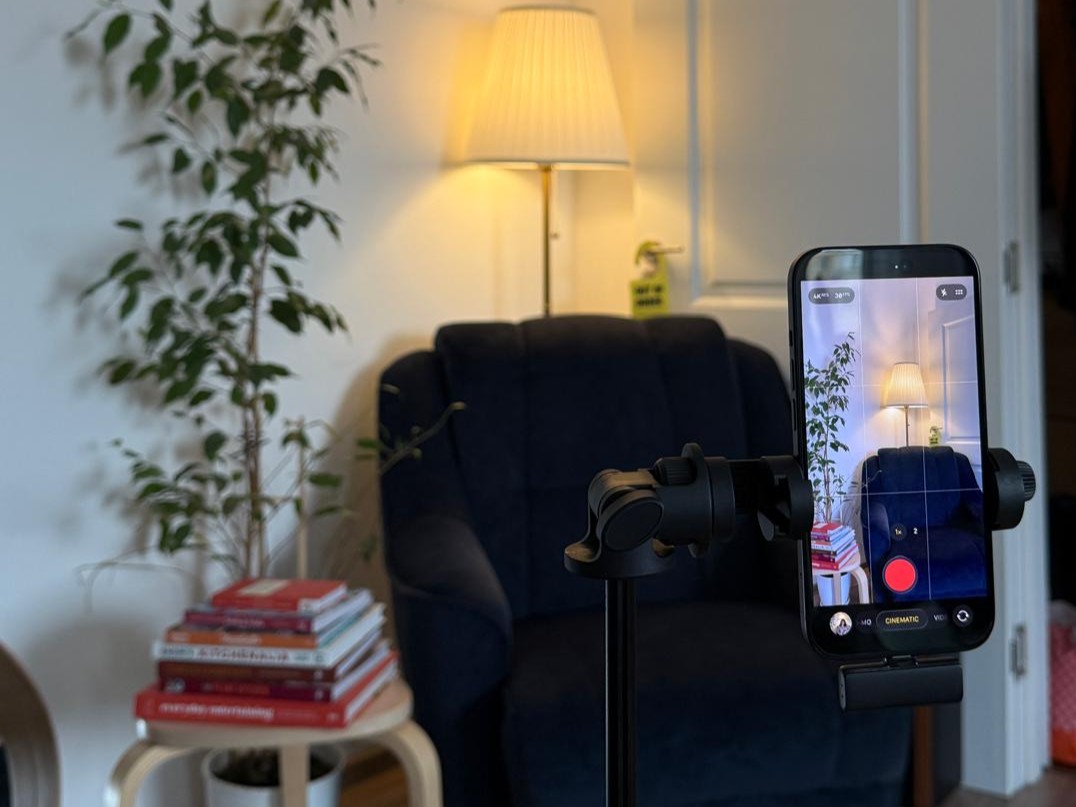
For property walkthroughs and shorter clips, a smartphone paired with a tripod can do much of the work. My biggest suggestion would be to experiment with your camera settings and choose the resolution and frame rate that work best for you. For example, using Cinematic mode on iPhone helps you blur the background while keeping the subject in focus.
Audio, on the other hand, is one upgrade I would make early on. For shorter videos and voiceovers, I personally use the DJI Mic Mini, a small wireless microphone that can connect to a phone and is easy to carry when recording on the go. RØDE wireless microphones are another common choice among creators, with models such as the RØDE Wireless Micro designed specifically for simple smartphone recording.
For podcast recordings, facing a window and raising your laptop until the camera is at eye level can already improve the look of your recording. Also, experiment with your laptop’s built-in camera and adjust the available settings to better suit your lighting and background. On Windows 11, for example, supported cameras can offer controls including brightness, contrast, saturation and sharpness. Good lighting and clean audio can also make a bigger difference than immediately upgrading your camera. If the image still looks flat or grainy, improving the lighting may be all you need.
If you record podcasts regularly, a desktop microphone can also be a worthwhile addition. Current recommendations include the Shure MV6 as a straightforward option for beginners and the Shure MV7+ for a more advanced podcast setup. A Blue Yeti is another familiar USB option for podcasters who want a microphone they can simply connect to their computer and start using.
READ ALSO: Multifamily Marketing’s New Look: From Listings to Infrastructure
Light the person, not the room
When it comes to video content, a small lighting adjustment can improve image quality faster than upgrading your camera. The easiest way is to face a window with plenty of natural light or another soft light source when possible. Avoid placing a bright window or light source directly behind you, as it can make your face too dark or wash out the background, thus overexposing the image. Natural daylight through a window is among YouTube’s recommendations for creators looking to keep their setup simple.
A ring light remains a practical option for solo, face-to-camera content because it provides even frontal illumination and doesn’t require a lot of space. If you’re recording a podcast episode with your laptop camera, positioning a ring light near the camera can help improve image quality.
For a two-person recording, focus on lighting both faces evenly. Depending on the setup, that might mean repositioning one light or adding a second light source. Since daylight can change during a recording session, it’s best to use a ring light with adjustable color temperature, which allows you to choose between cooler, neutral and warmer tones. Adjustable color temperature is useful specifically because it lets the artificial light better match surrounding light conditions.
However, if you’re recording a conference interview or a short social media video and can’t bring a full lighting setup, positioning yourself or your subject to face a window with plenty of natural light can still do the trick.
A ring light also isn’t your only option. For more polished recordings, creators often use a two-point lighting setup that combines a key light with a fill light, such as an LED panel or lamp to reduce shadows. You can also place a small light behind the subject to add depth and separate them from the background.
Small fixes for better recordings
A few accessories can improve your podcast recording setup without requiring a major investment. A pop filter can help soften harsh sounds, while a boom arm keeps the microphone in place and frees up desk space. For video, a tripod or phone mount can prevent shaky footage, and keeping a charger or spare battery nearby can save you from an interrupted recording. The room itself can make a difference, too. Curtains, rugs and furniture can help reduce echo and unwanted reflections, particularly when you are recording from a home office or another space that was not designed as a studio.
Still, not every fix requires a purchase. If you are recording with your phone, turn on the camera grid and level options before filming. The grid makes it easier to apply the rule of thirds, a basic composition principle that can help you position yourself or your subject more deliberately. The level can also prevent footage from looking slightly tilted. If you need a closer shot, move the phone closer rather than relying heavily on digital zoom, which can reduce image quality.
For laptop recordings, positioning matters just as much. Raise the computer until the camera is roughly at eye level with a laptop stand or even a few books. Microsoft recommends keeping the camera at eye level, centering yourself in the frame and avoiding leaving too much empty space above your head. When speaking directly to the audience, look into the camera rather than constantly watching yourself on screen.
LISTEN TO: Student Housing Unlocked: Inside Subtext’s Award-Winning Social Media Strategy
Finally, think about where the video will be published before you start recording. A horizontal frame generally works better for longer interviews and YouTube content, while short-form videos for social media are often designed vertically.
Pro tips before you hit record
- Before any recording, set aside a few minutes for vocal warm-ups and speech exercises, especially if you haven’t spoken much that day.
- Review your research notes and read your questions aloud before recording.
- Record a 30-second test and listen back with headphones before the real session starts.
- Clean the camera lens. It is basic, but fingerprints can soften an otherwise sharp image.
- Avoid sitting directly against a wall, as a little distance adds visual depth.
- Keep the microphone in a consistent position throughout the conversation and avoid covering it with your hands.
- When using an external microphone with your phone, record a short test to make sure the camera app is using it. Depending on the phone and app, you may have to select the external microphone manually.